Complete Mac Screen Recording Tutorials
Screenshot Toolbar - Native macOS Solution
The fastest and most versatile way to screen record on Mac using built-in tools
Best choice for most users - no additional software needed, built into every modern Mac
Keyboard Shortcut:

-
Open Screenshot Toolbar: Press Shift + Cmd + 5 to open the Screenshot toolbar at the bottom of your screen. You'll see a floating toolbar with various capture and recording options.
-
Choose Recording Type: In the toolbar, you'll see two screen recording options:
- Record Entire Screen - Captures everything on your display
- Record Selected Portion - Lets you drag to select a specific area
-
Configure Settings: Click the "Options" button in the toolbar to access important settings:
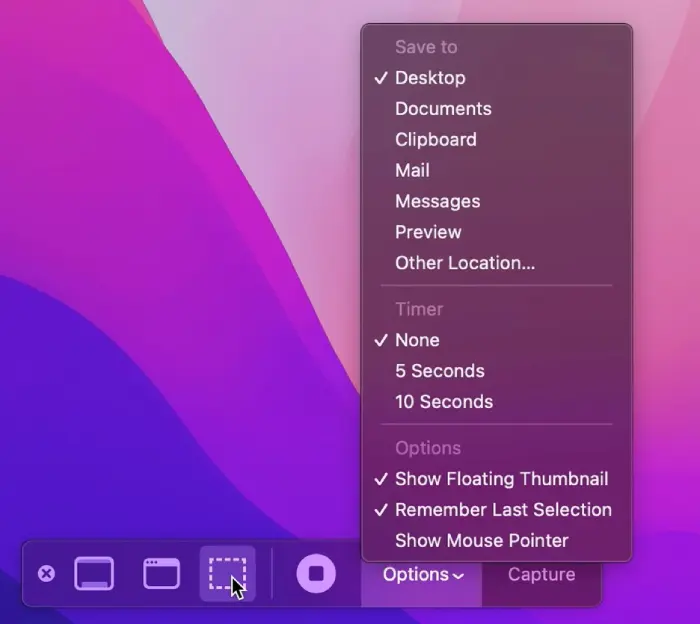
- Save to: Choose where recordings are saved (Desktop, Documents, etc.)
- Timer: Set a countdown before recording starts (None, 5s, 10s)
- Microphone: Enable to record your voice along with screen
- Show Mouse Clicks: Highlight clicks in the recording
-
Start Recording: Click the "Record" button in the toolbar or press Enter. If you selected "Record Selected Portion," drag to select your recording area first.
-
Stop Recording: Click the stop button (⏹) in the menu bar or press Cmd + Control + Esc. Your recording will automatically save to the location you specified in Options.
💡 Pro Tips for Screenshot Toolbar:
- Use the timer option when you need to set up your screen before recording starts
- Enable "Show Mouse Clicks" for tutorial videos to help viewers follow along
- Choose "Record Selected Portion" to reduce file size and focus on specific areas
- Test your microphone settings before important recordings
QuickTime Player - Alternative Native Solution
Alternative method using QuickTime Player for screen recording with more control options
Great for users who prefer a traditional application interface with built-in basic editing tools
-
Open QuickTime Player: Launch QuickTime Player from your Applications folder or use Spotlight search (Cmd + Space) and type "QuickTime Player".
-
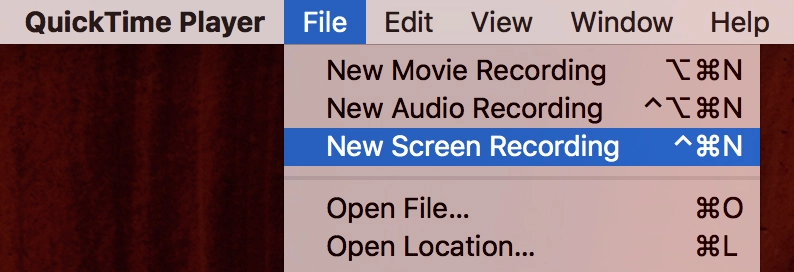
New Screen Recording: In the menu bar, go to File → New Screen Recording or press Cmd + Control + N.
-
Configure Audio Settings: Before recording, click the small dropdown arrow next to the record button to access audio options:
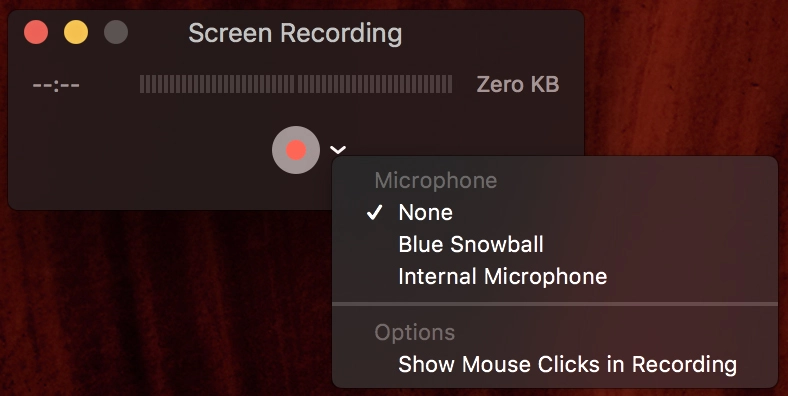
- None: Record screen only, no audio
- Built-in Microphone: Record your voice
- External Microphone: If you have one connected
-
Start Recording: Click the red record button. You'll then have two options:
- Click anywhere to record the entire screen
- Drag to select a specific area to record
-
Stop and Save: Click the stop button (⏹) in the menu bar. QuickTime will open your recording in a new window. Save it by pressing Cmd + S and choose your desired location and filename.

✅ QuickTime Player Advantages:
- Built-in basic editing tools (trim, split, rotate)
- High-quality recording with efficient compression
- Direct integration with other Apple apps
- Simple, user-friendly interface
- No additional software installation required
OBS Studio - Professional Free Screen Recording
Open-source broadcasting software perfect for advanced screen recording needs with professional features
Perfect for content creators and professionals who need advanced features and customization options
🌟 Why Choose OBS Studio?
- Completely free and open source - No watermarks or time limits
- Professional-grade features - Used by content creators worldwide
- Multiple scene support - Switch between different recording setups
- Advanced audio mixing - Multiple audio sources and filters
- Extensive plugin ecosystem - Customize with community plugins
- High-performance recording - Optimized for minimal system impact
-
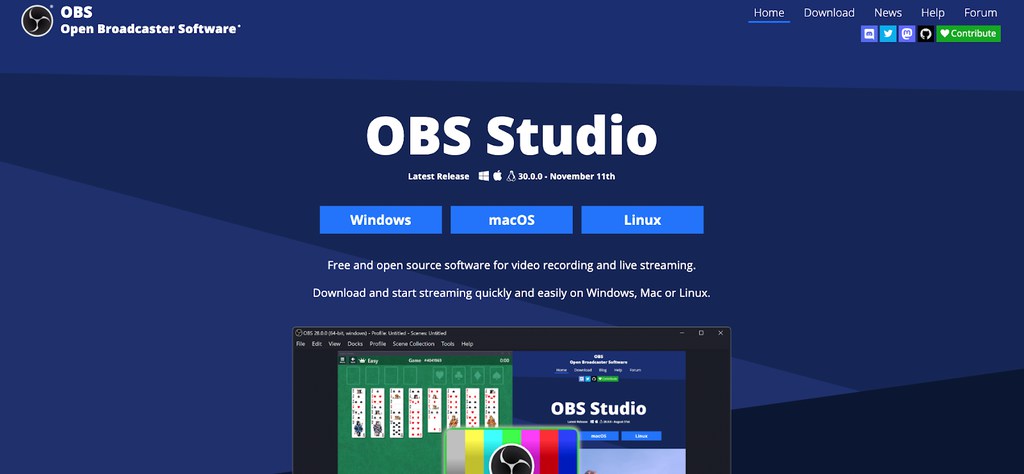
Download and Install OBS Studio: Visit obsproject.com and download the macOS version. Install the application and launch it.
-
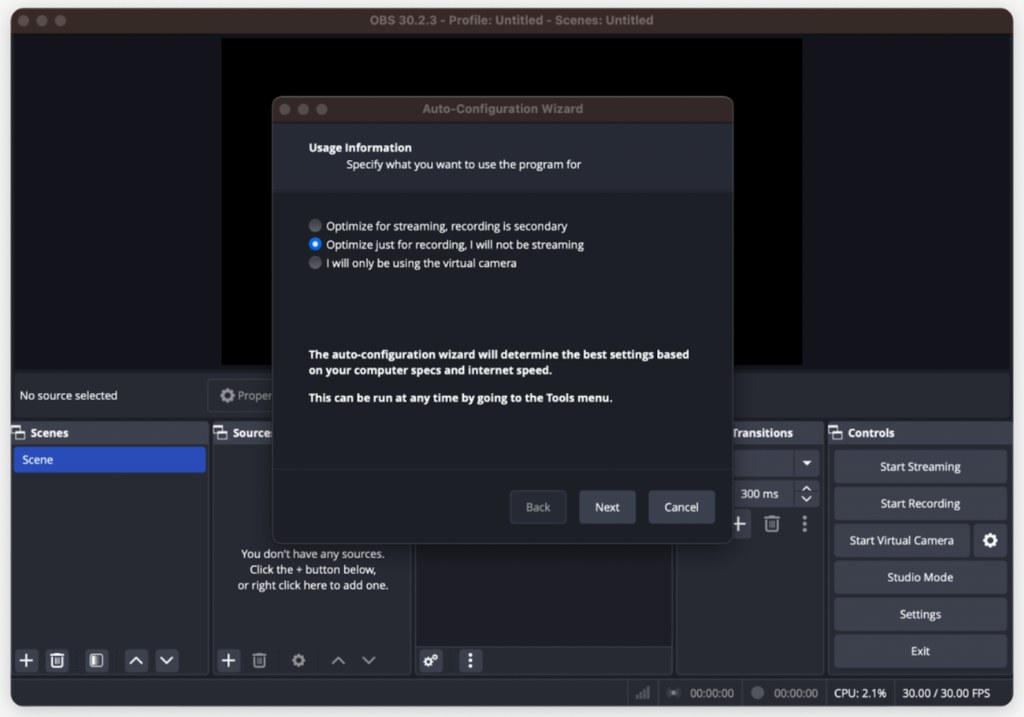
Grant Screen Recording Permissions: macOS will prompt you to grant screen recording permissions. Go to System Preferences → Security & Privacy → Privacy → Screen Recording and ensure OBS Studio is checked.
-
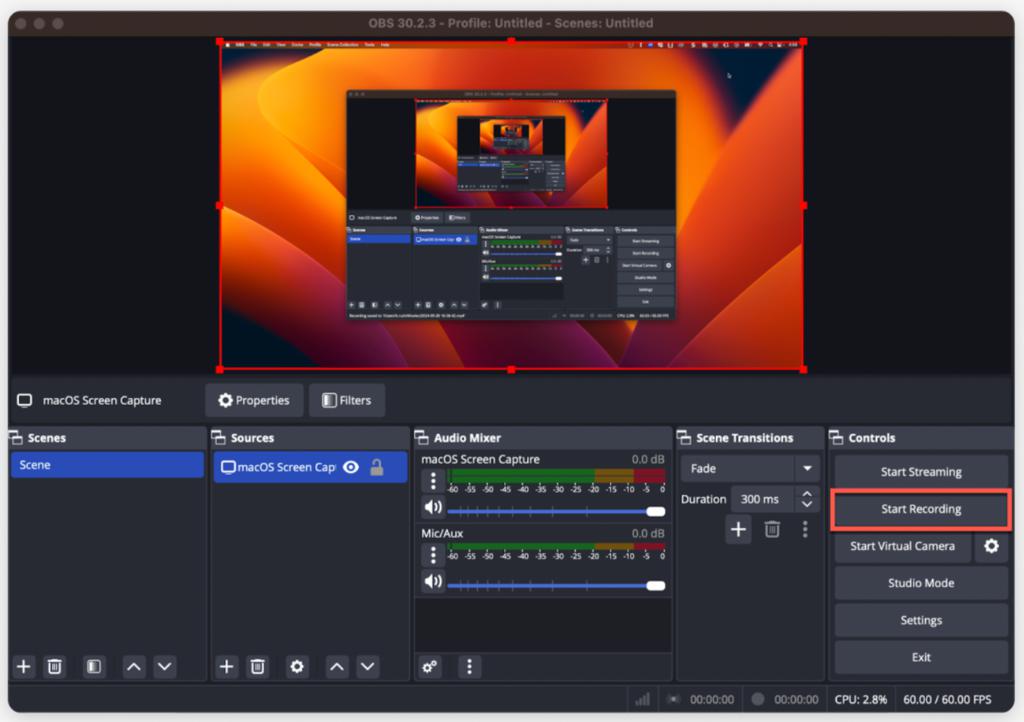
Add Display Capture Source: In the Sources panel (bottom left), click the "+" button and select "Display Capture" to add your screen as a recording source.
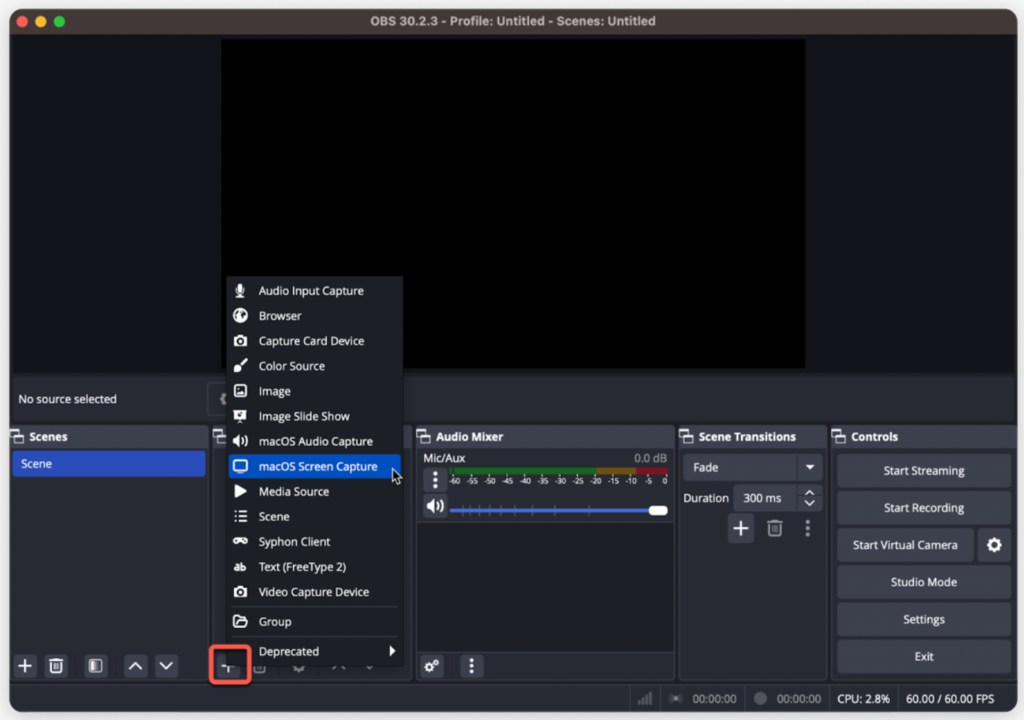
- Name your source (e.g., "Main Display")
- Click "OK" to create the source
- Configure display settings in the properties window
-
Configure Recording Settings: Go to Settings → Output to configure your recording preferences:
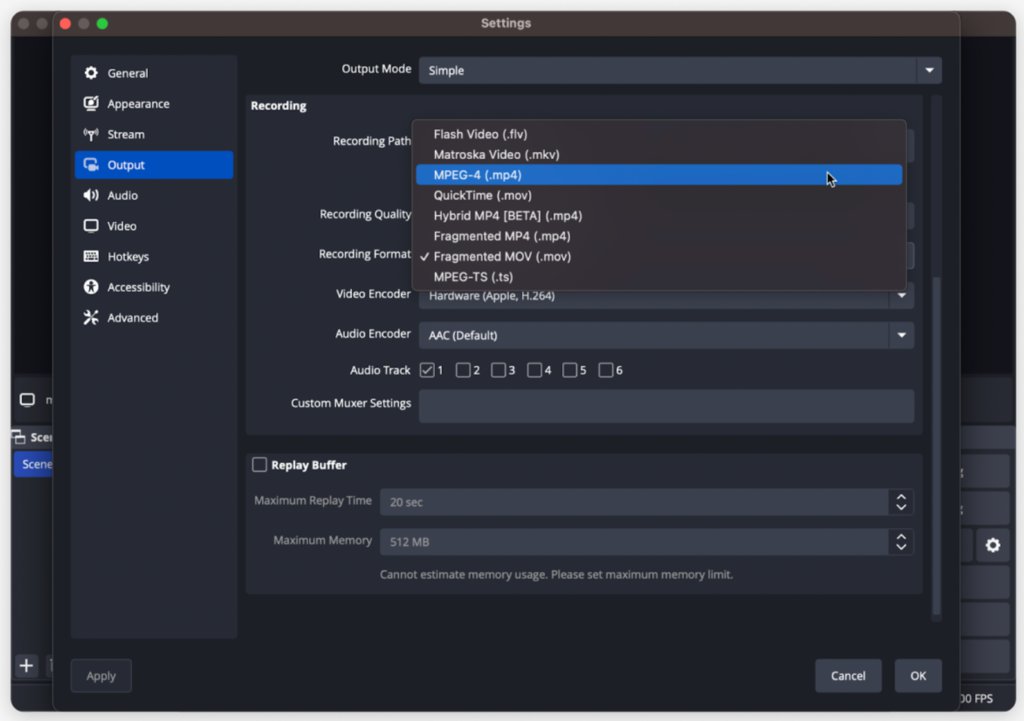
- Recording Path: Choose where to save recordings
- Recording Format: MP4 (recommended) or MOV
- Recording Quality: High Quality, Medium File Size
- Encoder: Apple VT H264 Hardware Encoder (if available)
-
Add Audio Sources (Optional): In the Audio Mixer panel, you can add microphone input for voice recording. Click the gear icon next to "Mic/Aux" to configure microphone settings.
-
Start Recording: Click the "Start Recording" button in the Controls panel (bottom right) or use the hotkey Cmd + Shift + R.
-
Stop Recording and Access File: Click "Stop Recording" in the Controls panel. Your recording will be saved to the path you specified in settings. You can also right-click the recording in the "File" menu to quickly locate it.
🚀 Advanced OBS Studio Tips:
- Multiple Scenes: Create different recording setups for various content types
- Audio Filters: Add noise suppression, gain, and compressor filters to improve audio quality
- Hotkeys: Set up custom keyboard shortcuts for quick start/stop recording
- Window Capture: Record specific application windows instead of entire screen
- Webcam Integration: Add your camera as a source for picture-in-picture recordings
- Stream and Record: Simultaneously stream to platforms while recording locally
